How to do the Woven Needlepoint Stitch

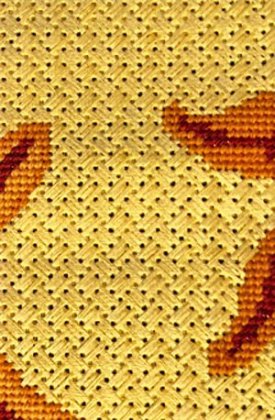
Colorful Starfish by Kamala JM-KL1104
Three of the best stitches to use for background areas in needlepoint are the woven stitch and its variations: Double Woven and Woven Trellis. They are also versatile stitches and good to use for clothing, buildings and grassy areas. The stitches are best used in areas where you don’t want the eye to go in one direction. (Diagonal stitches, conversely, will direct your eye to the direction in which they are stitched.)

Woven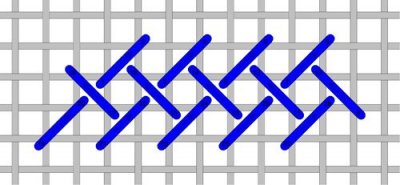
You will start this stitch on the left, moving in a straight row to the right. The stitch is 2 x 2. Complete the row. In your next row you will be returning to the left. Remember, the row below intersects the one above in a T. When finished, return to the right, again intersecting the row above in a T.

Double Woven – Twice the fun

The Double Woven is done in a similar manner. This time do two double tent stitches (pink), skip 2 spaces and stitch 2 more (grey). Continue until you’ve finished the row. On the way back, your first stitch (blue) will be in a T intersection with the first stitch on the right in the row above (Stitch numbered 9-10); your second stitch (green) in a T with the second on the left in the row above (7-8). The third row will go left to right, two spaces below the first row (aqua).
Woven Trellis Variation– 3 stitches with a variation
I have 3 children, and like this stitch it’s more than 3x the work of a single child. But worth it! And, once you have finished the first row, the rest easily falls into place (the stitches, not the children).
Again, we begin this stitch on the left. The first stitch is 3 x 3 this time (blue). Now do a 2 x 2 next to it (green), drop a row and stitch another 3 x 3 (blue). Skip 3 rows over & 1 up (stitch numbered 7-8) and repeat the pattern (grey). The top of your first stitches should be in the same row. Continue stitching to the right until you’ve covered the space.
When you return you will be going right to left. The first 3 x 3 stitch (pink) will be making an upside down T intersection with the bottom tips of the stitches in the row above and to the right (13-14 and 17-18) and tucked underneath the stitch above and to the left (11-12). You will be doing 3 stitches here as well, just in the opposite direction. Complete the row and start again going from left to right (pink). Use the bottom tip of the stitches in the row above as a guide for placement of the stitches in your next row. The stitches in this row are 4 rows below the first row.
Whether you use a single stitch, double or a more complicated Trellis, Woven is fun to stitch and will add a pattern to your background without directing your eye away from the main design.